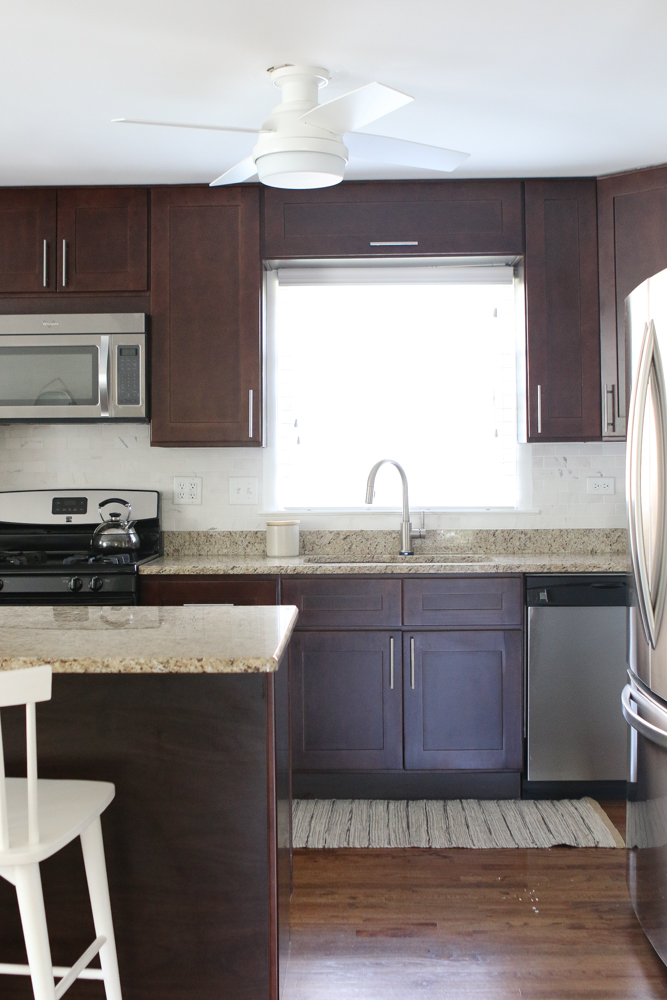
Old ceiling fan dating your space’s appearance? Update to a more recent design– it just takes an hour or more!

Some individuals enjoy ceiling fans– others do not care for them. However we can most likely all concur that they’re extremely practical, particularly in the heat of summer season
If you do not enjoy the appearance of your ceiling fan, attempt upgrading to a more modern-day, smooth alternative. That method you get both function and style in your area, which is a win-win in our playbook!
There’s no requirement to call an electrical contractor for this job– setting up a brand-new ceiling fan is something you can do in less than an hour.
Materials
- New fan
- Screwdrivers (flat and Phillips)
- Voltage tester
- Ladder
- Wire cutters
- Wire caps
- A pal
1. Turn the power off
This is without a doubt the most essential action for this job. To remain safe when dealing with the electrical wires, shut off the power to the ceiling fan.
Turn the turn on and off, and utilize a voltage tester to verify that there’s no power going to the ceiling fan prior to you continue.
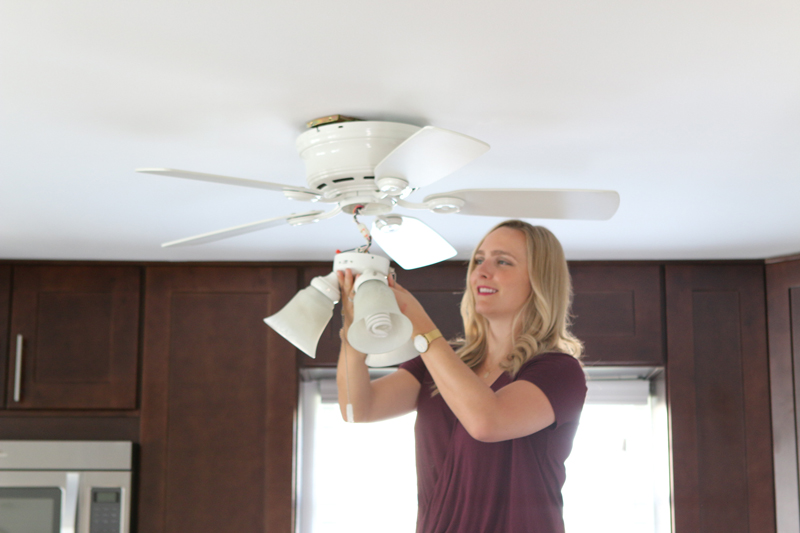
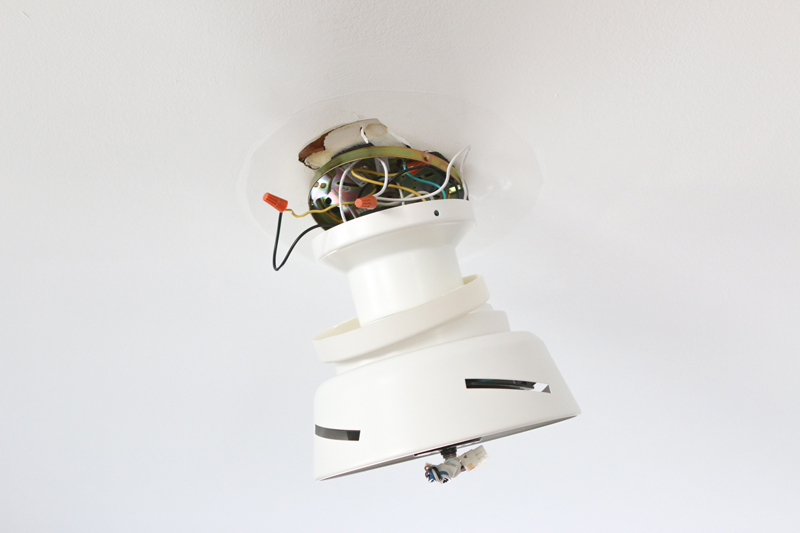
2. Get rid of the old fan
You’ll require your screwdriver for this one– and a pal to hold up the fan while you work. It’s an arm exercise, so ensure your assistant is all set to hold it as you rapidly eliminate it.
The procedure will depend upon your fan’s design, however you’ll probably start by getting rid of the lighting fixture, the fan blades and after that the base.
Generally, begin loosening pieces of the light and fan till you get it all off– simply keep in mind to snap a photo of how the wires were linked. Are they red to red? Black to black? Take a picture to assist you equate those exact same wire connections to the brand-new fan.
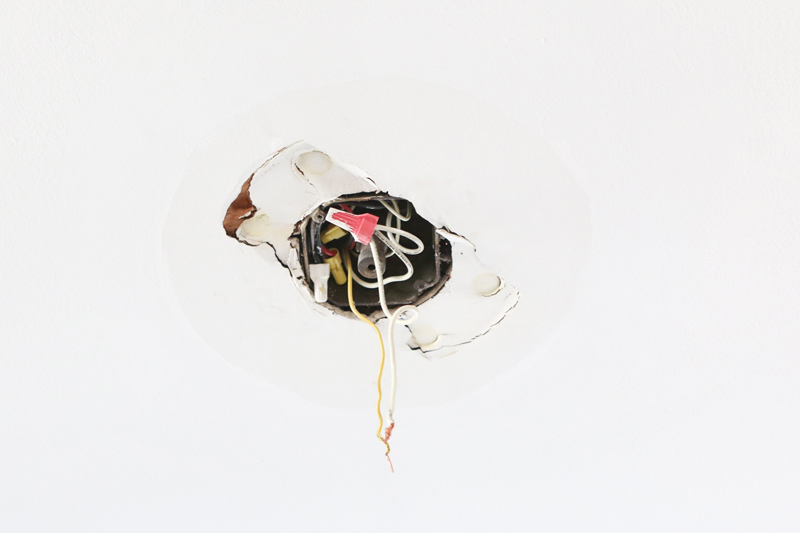
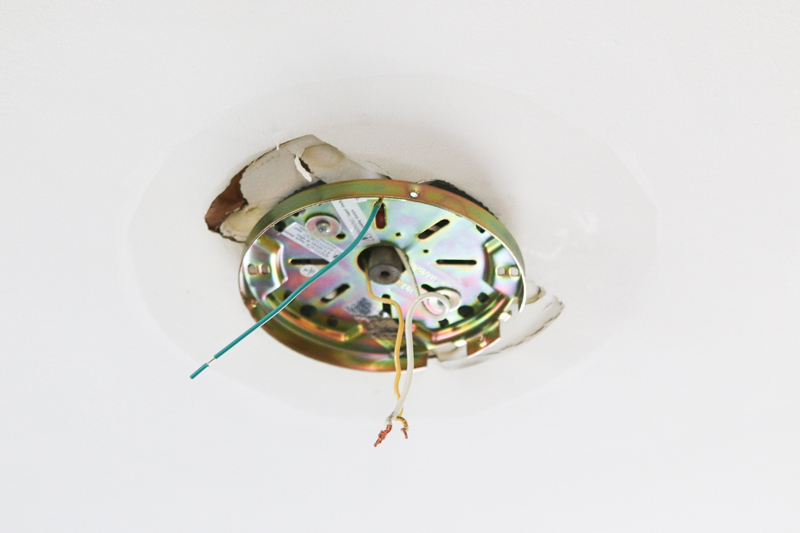
3. Set up the ceiling bracket
Now it’s time to set up pieces of the brand-new fan. To begin with is the ceiling bracket. Utilize the screws that include the brand-new fan, and protect it into the holes on the electrical box.
Bring the wires from the ceiling through the center hole. In our case, that was one white wire and one yellow wire (plus the green one on the ceiling bracket).
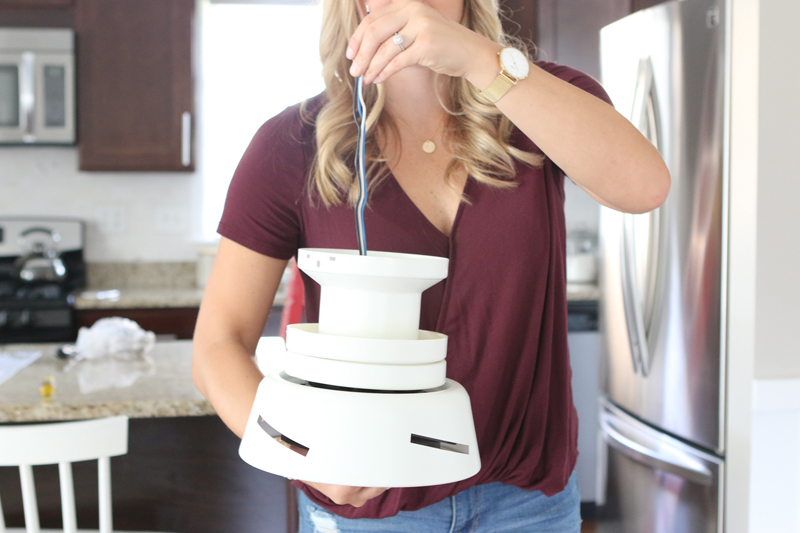
4. Preparation the fan
This next action will depend upon the make and design of your specific fan, so follow the instructions to assemble it properly.
For ours, we set up the canopy and download assembly, ensuring to bring the wires all the method through. You might likewise require to get your wire cutters and cut the wires a bit much shorter at this moment.
5. Connect canopy and wires
Bring your put together fan base approximately the ceiling, and hook it into the ceiling bracket. Many brand-new fans have a function that enables you to rest the fan on the bracket so you do not need to hold the weight while linking the wires. This will conserve you some severe arm discomfort!
Once the fan is safe and secure, link your wires. We had 3 sets of wires to represent: wires from the ceiling, wires from the fan, and wires from the receiver inside the fan (which lets us utilize a push-button control).
Initially, we linked the ground wires from the ceiling, fan and ceiling bracket. Next, we linked the wires for the push-button control– yellow to black, blue to blue. Lastly, we linked the neutral wires (white to white) and hot wires (black to yellow).
Note: The wire colors might be various depending upon your fan design and the wires in your ceiling.
Utilize the wire caps to produce safe and secure connections. You do not desire any wires slipping out when you press everything up into the ceiling, so it is necessary to actually twist on those wire caps.
We then tucked the wires nicely into the ceiling and screwed the canopy’s base into location.

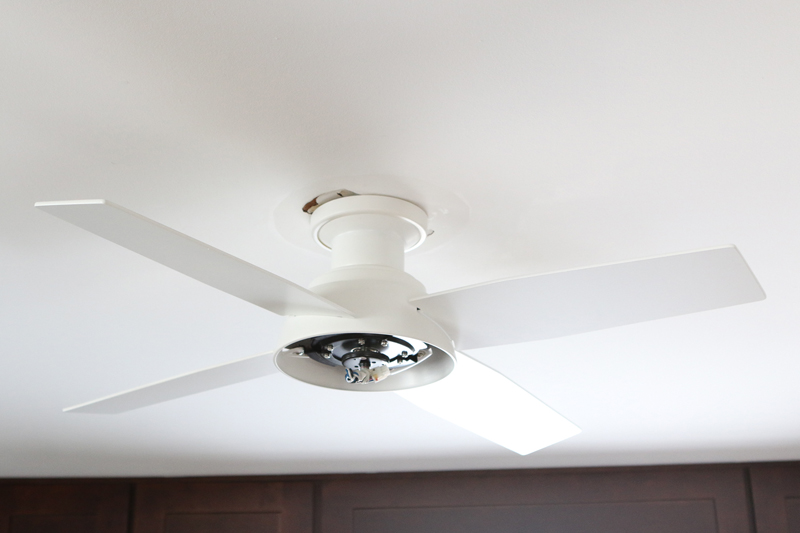
6. Connect blades
Time to make it appear like a real fan! Take your fan blades, and screw them into the canopy, following the instructions for your specific design. We recommend positioning a towel underneath the setup in case you drop any screws.
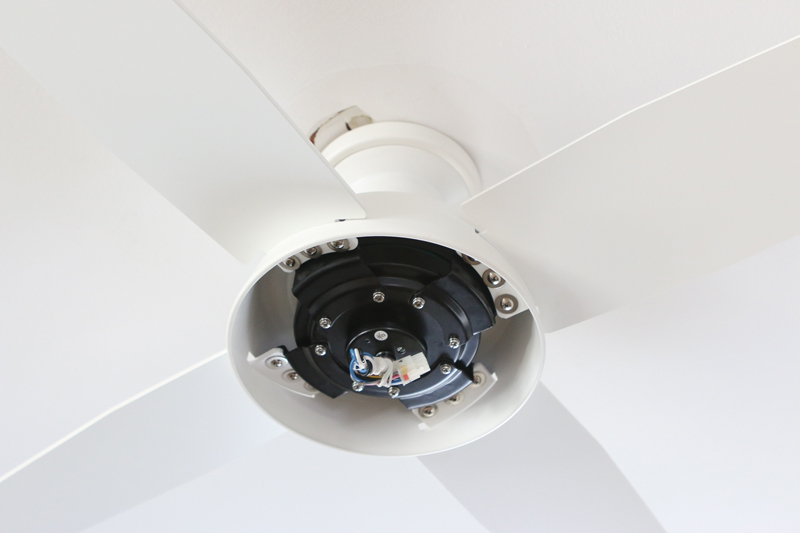
7. Include the switch real estate
You’ll probably put your switch real estate into location utilizing screws. There will be a wire plug that goes from the upper to the lower switch real estate. Make certain this connection is safe and secure, since it’s what turns the fan on.
8. Include cover plate and switch on the power
We remain in the house stretch at this moment. Put simply the glass cover over the real estate set till it clicks into location. Now it’s time to switch on the power and test the fan to ensure your effort settled.
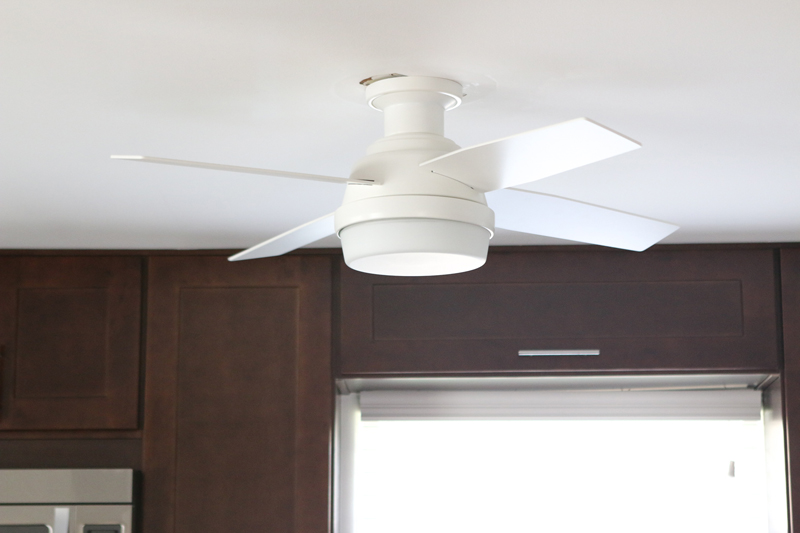
Eliminating the old fan left us with a little bit of damage on the ceiling. An easy spot and paint will make your ceiling appear like brand-new, and your upgraded fan will suit effortlessly with your house decoration
If you can alter a lighting fixture, you can quickly alter a ceiling fan. All it takes is a totally free afternoon and a client assistant to do the job!
Related:
.